It may be a 45 mile drive between SmugMug headquarters in Mountain View, California and Treasure Island, in San Francisco, but when you walk into our headquarters you find yourself surrounded by San Francisco. The Bay Bridge, the Ferry Building, Coit Tower, and the Golden Gate Bridge envelope you. You stare at a storm burning the sky in front of you. That’s because you’re looking at a giant panoramic photo taken by SmugMug co-founder Chris MacAskill.
Over 2 days, Chris took 336 photos with a long telephoto lens (the Canon 300mm f/2.8L for those lens junkies out there!) and his trusty Canon 5D Mark II and turned these two evenings into one of the most visited photos in Silicon Valley. Featured in the San Jose Business Insider and the Huffington Post, this amazing wrap-around print attracts tens of people each week to visit all the stunning photos at our headquarters.

Originally printed in 2009, its been gracing our walls ever since. Over the course of time, though, it’s seen better days, most notably thanks to a pot of flying coffee. SmugMug has also grown over the years and the Media Room that’s been its home for the last 6 years has also changed, no longer serving as our home for watching movies and thereby negating the need for the photo to be super dark. It needed to be re-printed and that’s where I come in. It was time to re-process the photo and use the latest Photoshop, Lightroom, panoramic stitching and luminosity masking techniques.
Over the course of 1 and a half months, I got the original RAW files from Chris, imported the photos into Lightroom, re-processed each individual photo, stitched them into several panoramas and then blended various exposures together. Three different pieces of software were used, various Photoshop filters applied, and lots of hours spent perfecting it. Here’s how we did it.
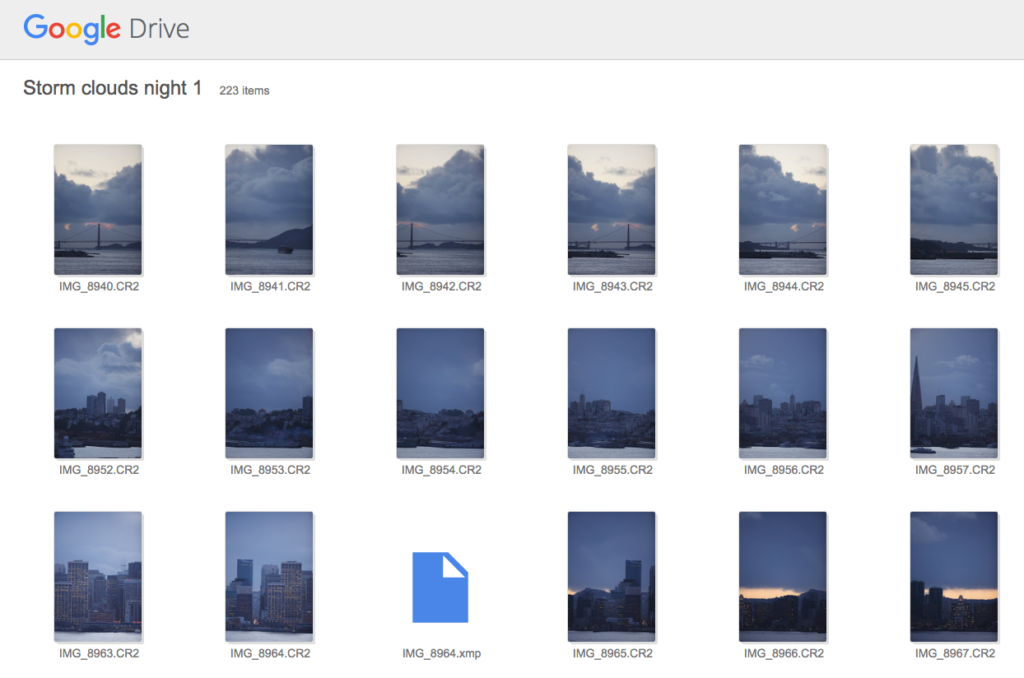
Getting the Files: Google Drive
Chris backs up all of his photos to Google Drive. Since the photos were already in the cloud, he just had to share the files with me. I was able to use the “Google Drive” desktop app to sync the files to my computer.
Processing with Lightroom
The first step in reprocessing the panorama was importing the photos into Lightroom. Chris had sent me all the files as Canon CR2 RAW files with his edits saved as separate XMP sidecar files. I hate keeping extra XMP files and I immediately converted the photos to Adobe’s own RAW format: DNG, which combines the RAW and edit information combined into one file. The XMP sidecar files were then deleted.
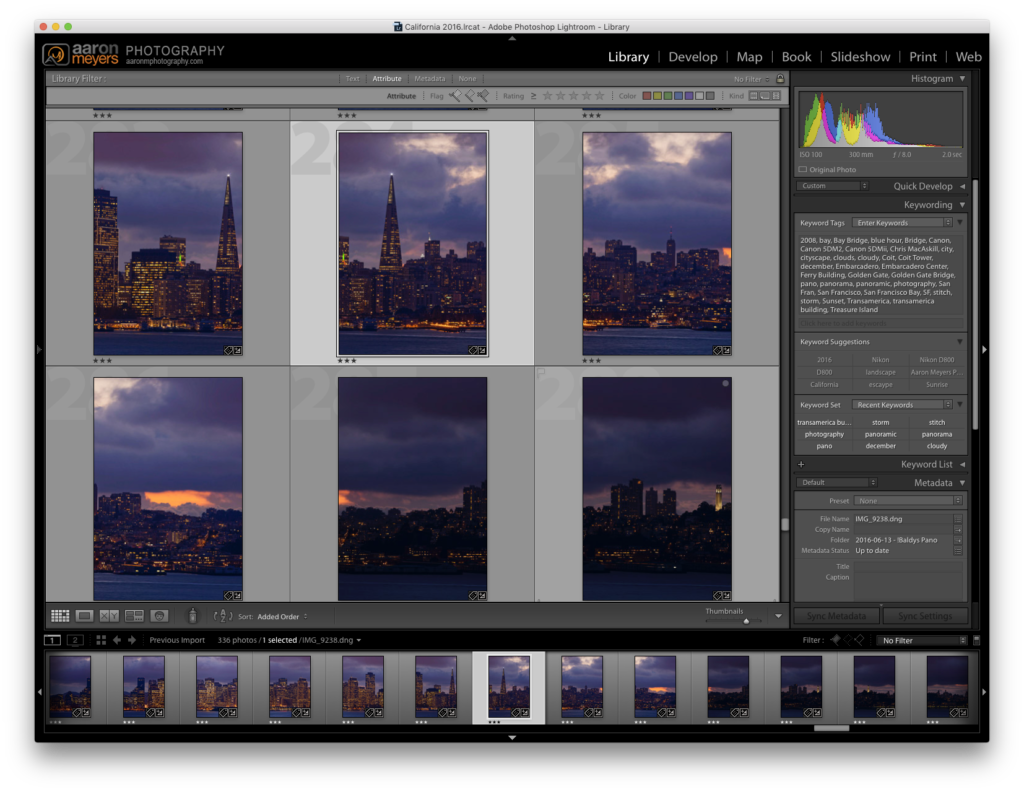
Now it was time to start editing. The first roadblock I stumbled upon was figuring out how Chris photographed this. When you create a panoramic photo you start on one edge of the scene and then slowly move the camera left or right, then up and down. Each photo should overlap the previous one by at least 30% so that there is enough area to match up the same features between photos. Overall, I had to sift through:
- 2 days of photos
- 36 slightly overlapping photos per pass
- Multiple passes of the same exposure as he tried to “get it right”
- 3 different exposures (too dark, normal, and too bright)
- Changing light as the sun moved closer and closer to the horizon and eventually disappeared
To get a handle on the 336 photos that I was sorting through I took advantage of Lightroom’s “Stacking” feature. It allows you to group photos together in a “stack” that can be collapsed and expanded. This allowed me to group each pass of photos together. Each pass was photographed with the same settings (same shutter speed, ISO, and aperture) so that they all looked the same, but each pass might be slightly different from the previous (for example, pass 1 might have used aperture f/5.6 while pass 2 used aperture f/9). I was going to edit every photo in a given pass the same, then repeat for each pass.
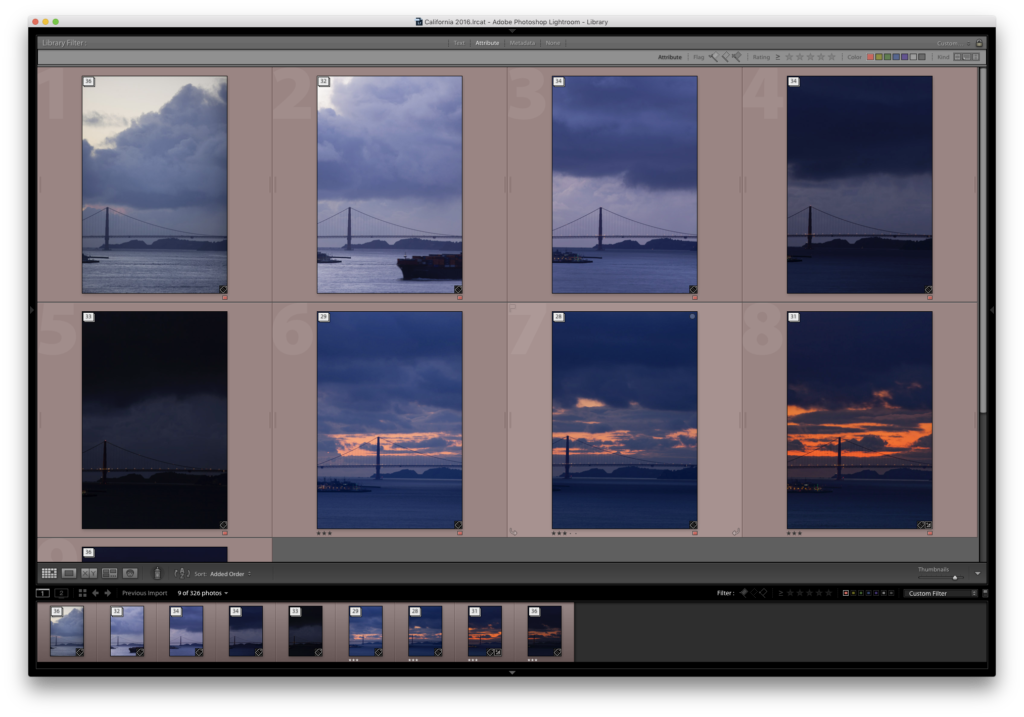
Now that the photos were stacked into their groupings, it was time to start editing. Lightroom has a nifty feature that allows you to copy and paste your editing settings from one photo to the next. All I needed to do was edit 1 photo in each pass, then apply it to the rest of the photos in each stack. Canon 5D Mark II files have a hard time capturing really bright scenes and really dark scenes all at once (i.e. “dynamic range”), so I had to make sure that I didn’t push the limits of each of these files. Luckily Chris took bright and dark versions, which would later enable me to control brightness without pushing the files too much and avoid unnecessary noise in the image.
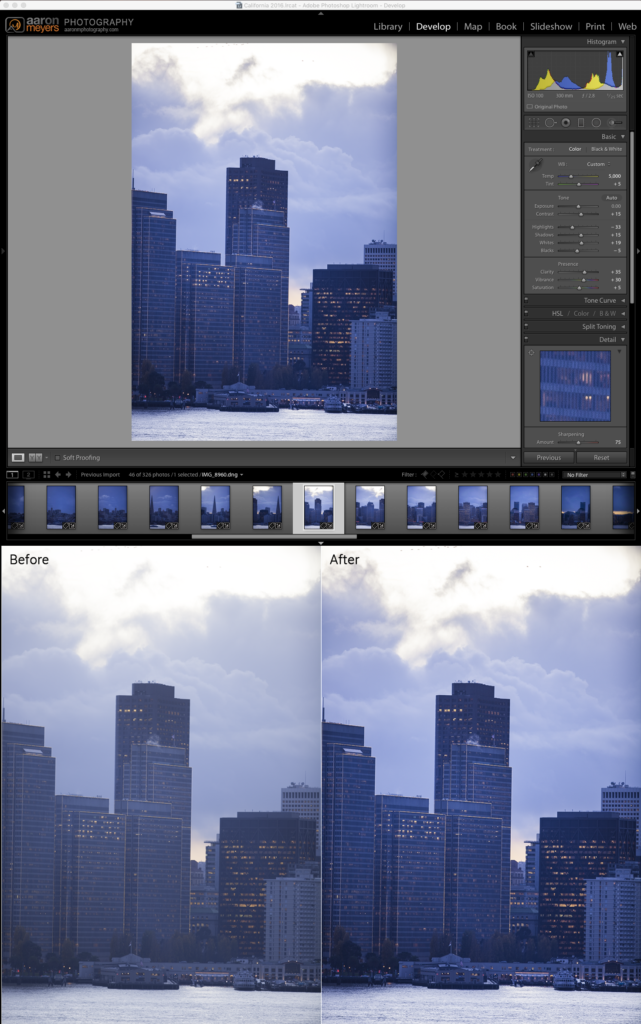
I left the white balance mostly the same, knowing I’d be cleaning up the color balance, temperature, and tint later. I focused mostly on extracting color and detail from the photo by increasing the contrast, clarity, vibrance, and saturation. I also slightly reduced the highlights to pull out some of the detail in the clouds while also increasing the whites so they still retained the look of clouds, and also brightened the city lights.
This is the point where I ran into my first unexpected bump (though easily surmountable). Chris initially made a common mistake, he photographed the pano in “Aperture Priority” mode, which meant that the cameras sensitivity to light (ISO) and aperture (f-stop) were fixed but the shutter speed changed as the camera tried to guess the exposure. In theory every photo would come out with the same brightness but the camera got fooled in a few of the photos. Some of the individual photos in each pass were darker or lighter than others. I had to fix the exposure on each photo before proceeding, trying to get each photo to have about the same exposure.
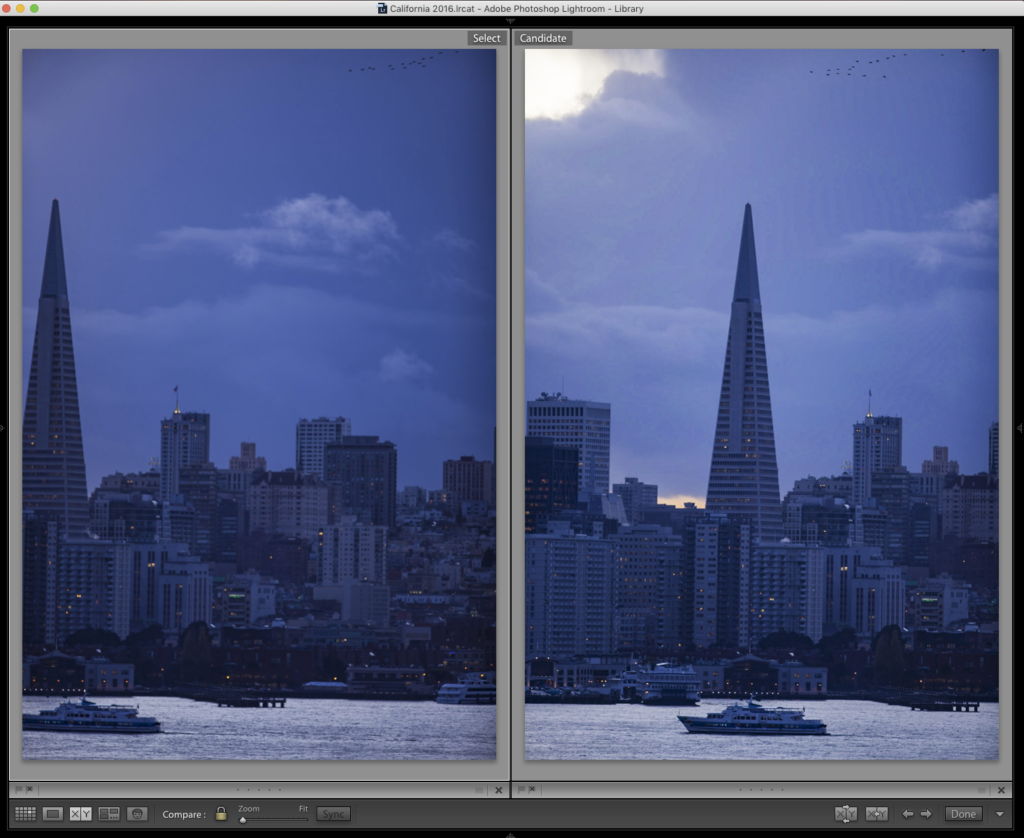
Some of the passes were done, as I would have hoped, in Manual mode, with the shutter speed, aperture, and ISO all fixed. The only problem with these is that taking 30+ photos takes time, and in that time the sun is setting and getting darker. If Chris started taking photos on the left (the Bay Bridge), by the time he got to the right (the Golden Gate Bridge), the sky would be much darker. I had to account for this as well and processed the photos so they’d have similar exposure.
Lastly, I wanted to get as much detail out of the sky as possible and that meant applying a gradient filter to the sky to increase its warmth, darken it, and bring out the mid-tones and darks in the sky by increasing contrast and clarity. The shapes of the storm clouds became more apparent and the clouds returned to a more natural looking color.
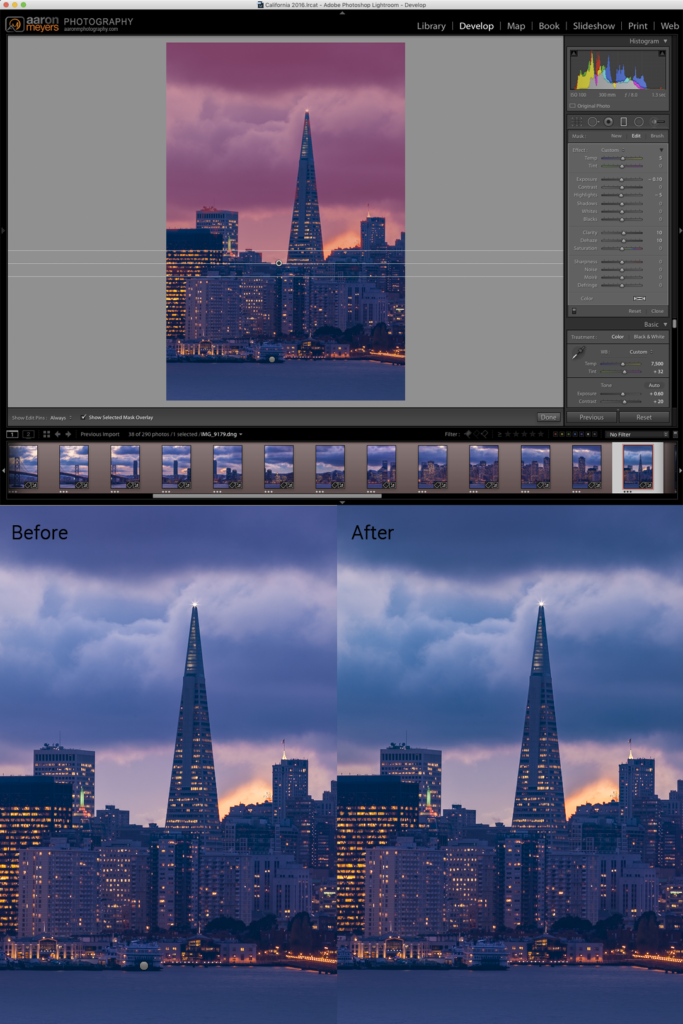
Bottom: Extra details are pulled out in the sky and the purple color reduced
Stitching with Autopano Giga
Once each stack of photos was processed in Lightroom it became time to stitch the 30-36 photos into one long panorama using an amazing piece of software called Autopano Giga. Let’s start out by discussing a few key terms that are useful to know when stitching panoramas:
- Projection: how the software maps a 3D scene (San Fransisco) into a 2D image (our panoramic photo). Cambridge in Color has a great tutorial that’s worth reading if you want to know more.
- Control Points: are spots identified on 2 or more photos that are identical. They’ll exist in different places in each photo and by identifying where that specific point is on each photo we can then align the photos based on this. Control points can be things like the edge of a building, a boat, a tree, a door, anything that you can identify as the same point in both photos.
- Rendering: refers to the final step of running all the real mathematical calculations to determine how the pano will look. It performs a number of steps: warping, deghosting, exposure blending, color balancing, (and much more) before finally saving the blended panorama.
Photoshop and Lightroom can stitch panoramas but there’s a few reasons why I prefer Autopano:
- Autopano lets you specify the # of control points each photo will find. The more control points, the less chance of “ghosting”, where 2 photos aren’t properly aligned and a blurring effect results.
- Autopano also lets you manually add or adjust the points, in case it guessed slightly wrong, which allows me to improve the accuracy of the stitch
- Autopano lets me change the “Projection” on the fly, before rendering. This lets me figure out which projection will give the most realistic looking photo
The first step here is to let Autopano detect the control points and the align the photo. It will then offer a preview of the stitch, while still allowing me to add or edit control points, change the projection type, and more.
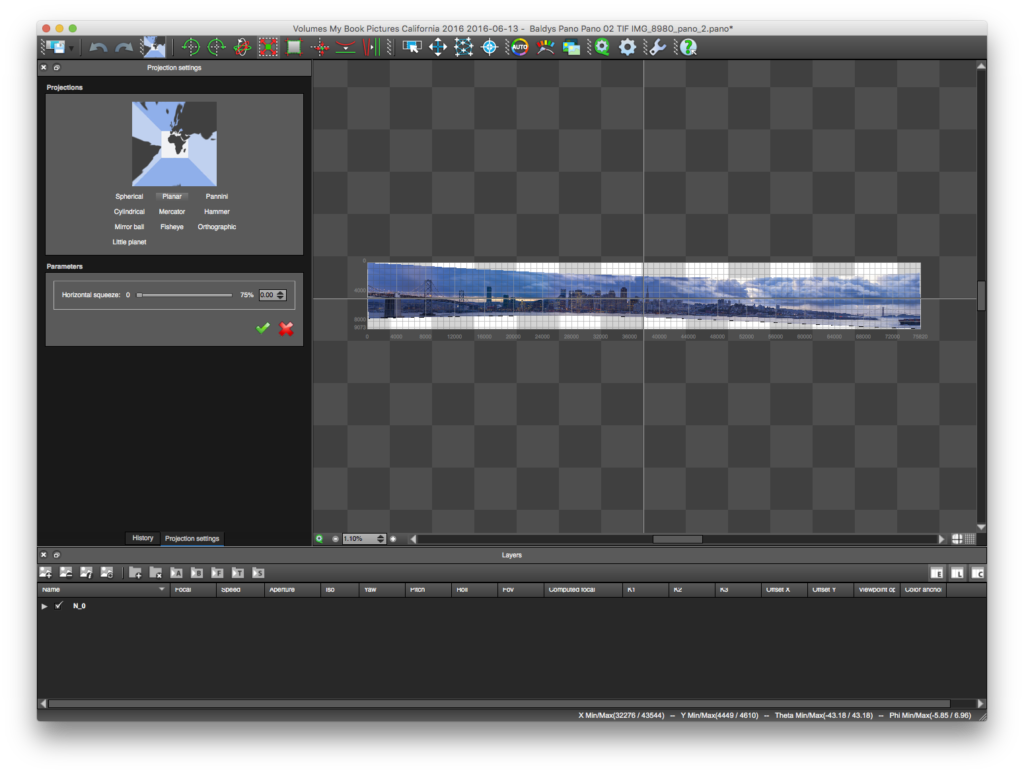
Choosing different projection types let me see which of the projections created the most realistic looking photo. Autopano initially suggested “Planar” but I found that “Spherical” returned the best results. The planar version, which you see below, had too much “bowing” in the center. You’ll notice that the horizon line tilts downwards as you move away from the center of the photo, something I wanted to avoid. The Spherical projection had a straight horizon, exactly what we wanted!
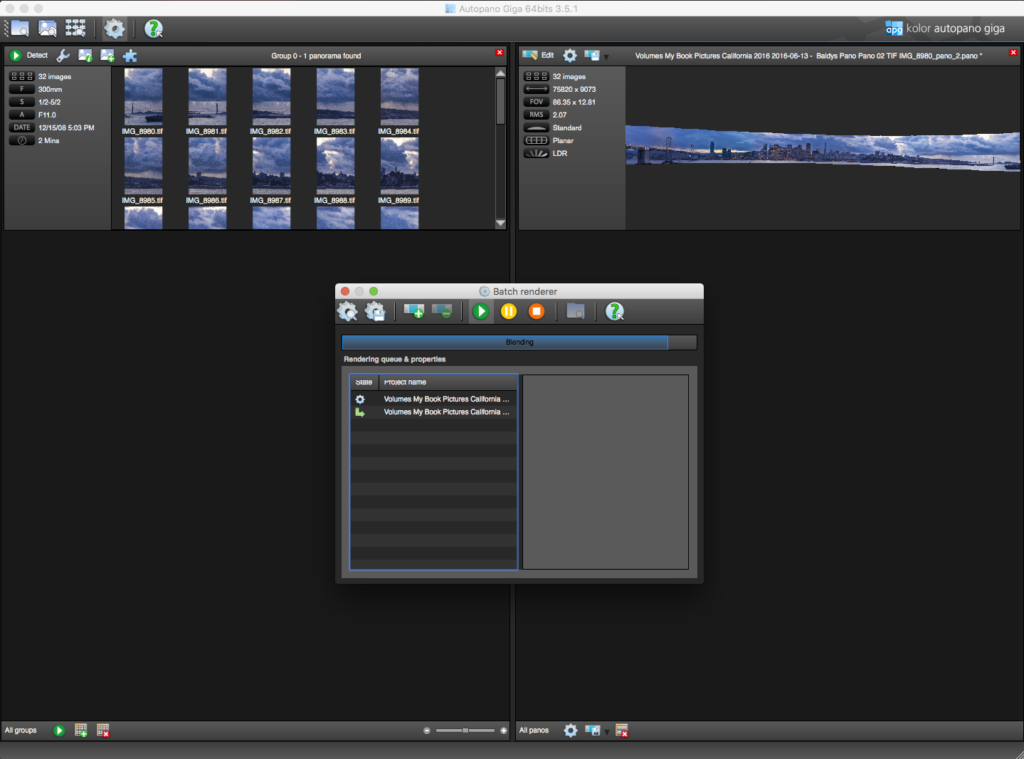
Once you’re all set with the settings, Autopano rendered the panorama into its final 400 megapixel image. Rendering a 400 megapixel image can take some time but I had borrowed one of SmugMug’s Mac Pro trash can computers and it whizzed through the calculations and saved the photo to an external hard drive.
Processing in Photoshop
Now that the photos were stitched, it was time to bring them into Photoshop and begin working on fixing the issues. The first problem to tackle was to remove the purple and orange cast from the buildings. They ended up slightly purple thanks to the white balance of the sky, but in reality the buildings shouldn’t be as purple and the lights shouldn’t be as orange as they are. Using Color Balance, Hue Saturation, and Selective Color adjustments I was able to remove the purple and orange colors and warm up the buildings a little.
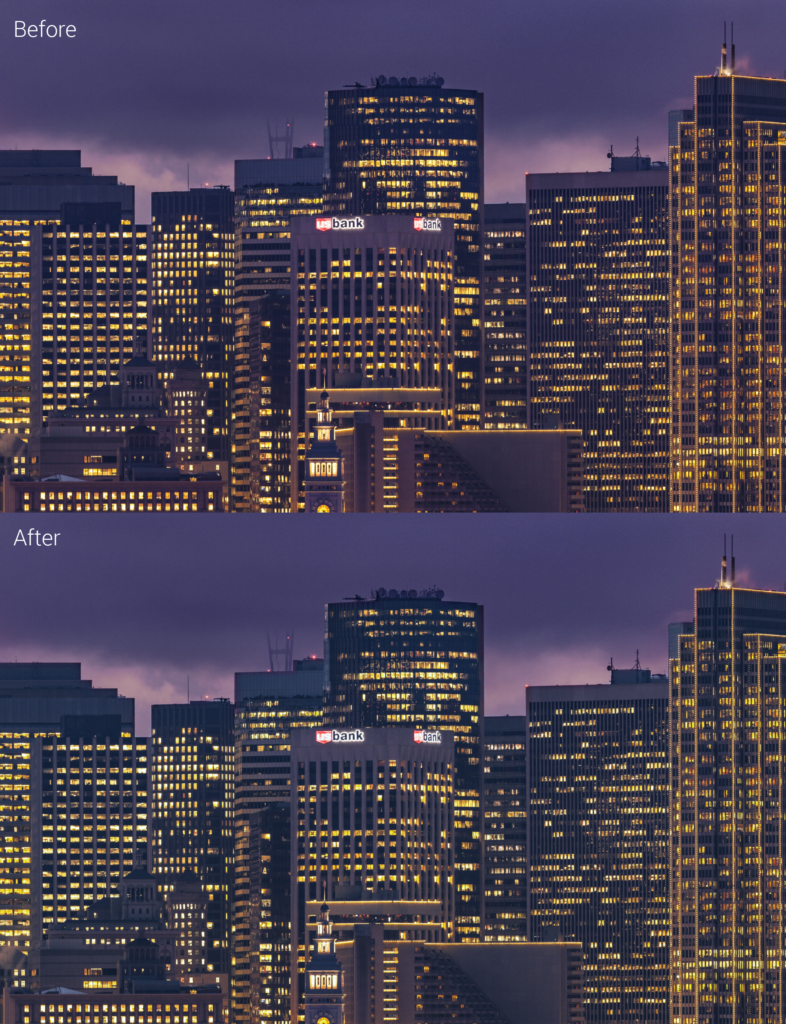
Bottom: The odd colors are removed using several color adjustments
Since the sky is such a major part of this photo, almost instantly I noticed an interesting effect: the thickness of the clouds caused them to change in color, from blue to purple. Even if this color variation was natural, it just looked weird and needed to be corrected.
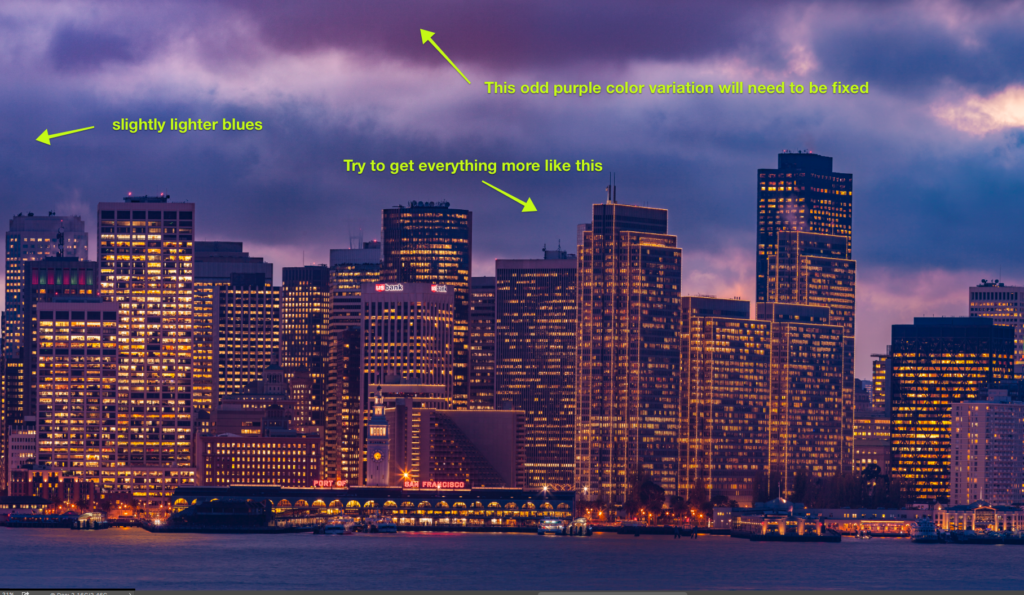
On closer inspection, I noticed that the Spherical projection wasn’t quite perfect: at the edges of the photo the horizon and the Golden Gate Bridge were slightly slanted. Using the “Puppet Warp” tool in Photoshop, I was able to to straight the edges that had bowed on the corners.
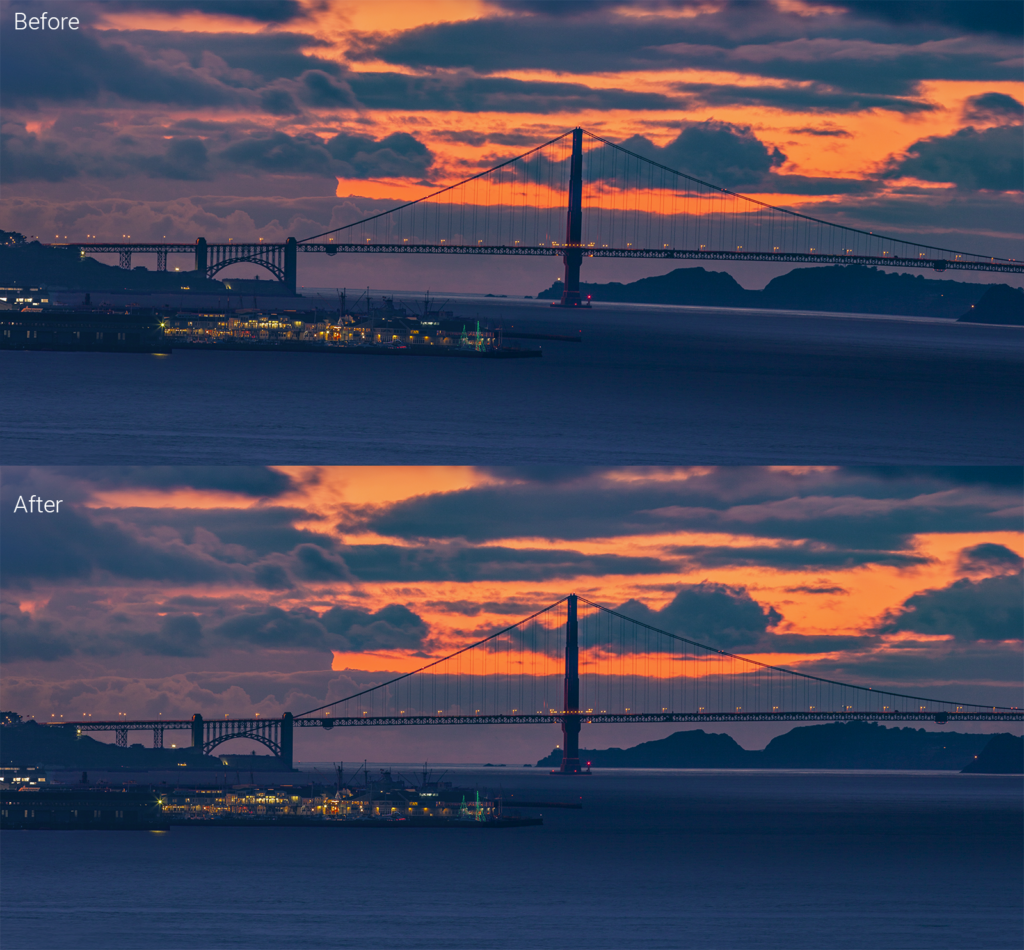
Bottom: The Puppet Warp tool fixed the warped edge.
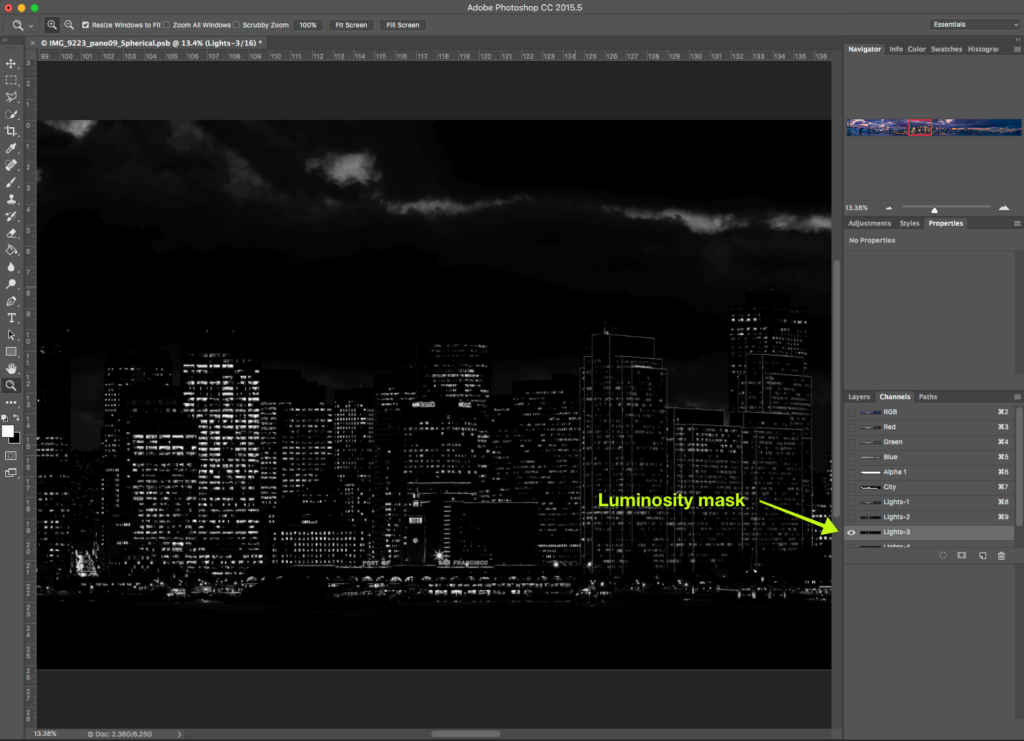
A number of things needed to be cleaned up in the photo: the city lights were brightened a bit, the clouds had some extra detail returned in them and shadows in the city buildings were pulled out in order to make them look less black. Trying to do all of this manually would have been a great amount of effort, however, I let photoshop do this for me automatically. Using “Luminosity Masks” photoshop can automatically select parts of a photo based on how bright they are, and then only apply changes to areas that have that brightness. For example, below you can see how Photoshop automatically detected the brightest parts of the photo, allowing me easily make changes to the city lights:
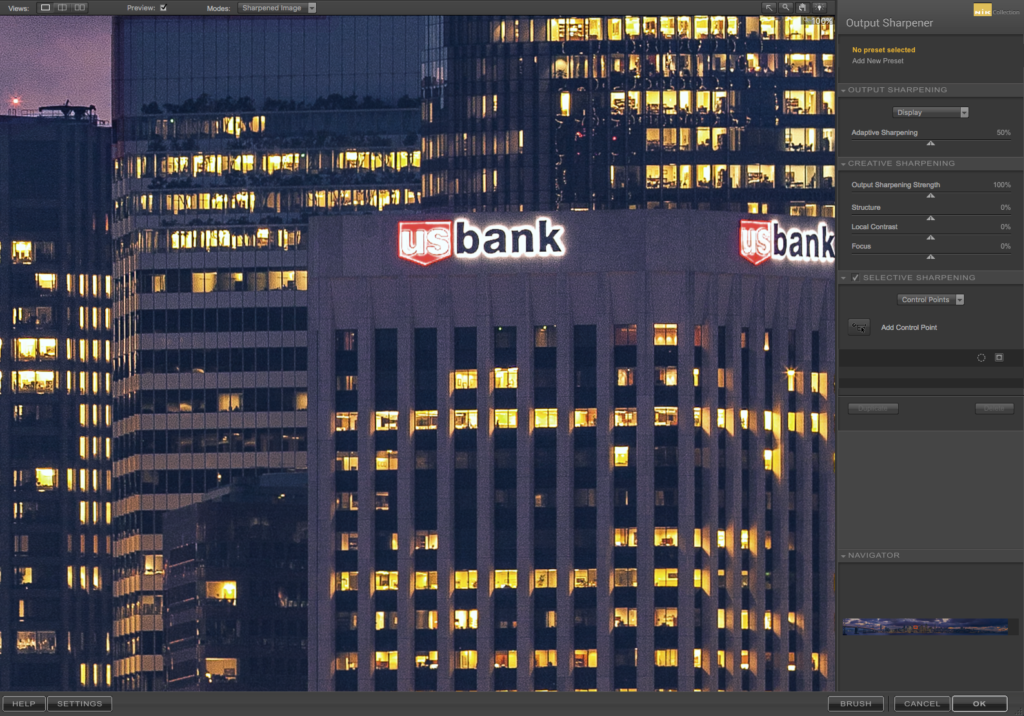
The final step was to add some sharpening to the photo. For this I use the free plugin from “Nik” software called Sharpener Pro 3. I just used the default settings to add a little bit of sharpness to the photo.
The Final Image
With all of the photos pre-processed, stitched, and then edited to perfection in Photoshop, we are finally done! The final photo came out to a whopping 425.5 megapixels (67,683px wide x 6,288 px tall at 240 ppi).
Compare the original edit:
To our final edit:

